Sunday, April 8, 2012


I got the table all set up! Drawers are filled, and work space is arranged. I even got to do a little sewing on it already.


I picked out the stool first and then he determined what height to make tabletop.


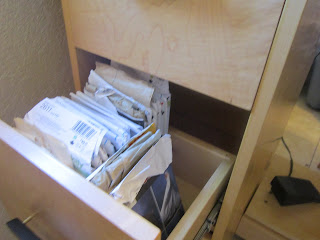
In 3 drawers I have cans to wind and store all my notions, and 3 drawers hold all of my patterns (Boy/men's, women's, girl's). The drawer above the shelves holds all of my thread and bobbins.



The Lazy Susan isn't quite done yet, but it works nicely. Since both my surger and sewing machine can use the same foot pedal/power cord, I can simply unplug one machine, spin it to the other side, and plug in the other machine. Sweet!


The Susan will not be attached to the table, so if I need extra work space I can move it aside. I can also adjust where the pedal sits, so I can position the machines wherever I need to.

Friday, April 6, 2012

Awesome Daddy

My awesome husband finished my wonderful sewing table.
7 drawers
3 adjustable shelf bookcase
Maple, with bamboo top, and ebony accents


What you don't see is a stand to put the machine pedal at the right height, and it is the perfect height for me to stand and work without killing my back. To top it off, he is making a Lazy Susan for me to put my sewing machine and serger on so I can switch them without moving from my stool. When it is all set up I'll post another picture.

I'm one happy girl!

Saturday, February 18, 2012

Quick, Fresh , New Napkins

I really mean quick!


We have used cloth dinner napkins for years. Early on, I used terry cloth utility towels I bought from the store. Later, when we started using cloth diapers, the complaint was made that the napkins looked too much like the rags I used for wipes. So, a couple years ago I decided to make some flannel ones. I found some flannel on sale and made some. They were very simple and effective, but small. We have used them regularly for the last 2 years, and they are showing some slight wear, but they have held up well.


I came across some navy flannel on sale and thought that it would be just right for napkins for my messy family. I ordered 2yds and washed and dried it as soon as it came. This afternoon I got my chance. I measured the washed fabric and calculated that I could get 48 napkins measuring just over 11" square. Once I got them all cut out I started surging the edges. (I really whipped them out so don't look to close to the corners; if I were to make some to give someone else I promise I would take a little more time to make them look nicer.) I kinda like the contrast of the white thread on the blue. Done in around 2 hours.


Now, these are for normal everyday, practical use. They may not be "formal dinner" nice, but we rarely have formal dinners so informal absorbent and bigger works for me! Another plus is if I don't get to the laundry for a couple days, we are still covered. Yay!

Sunday, December 25, 2011

Jars for presents

As we were working on these my oldest lights up and says, "Mom! You must take pictures to post on Pintrest!"

Well, I'll post them here and share there. They were fun.


I mixed some white glue with water and we "painted" the mason jar with the mixture. We then laid tissue paper on the wet surface and "painted" over the paper to insure it was stuck.


The colors did bleed some but it made a neat effect.


I set the jars in the oven not to bake, but because it was a safe spot away from curious little hands.


We placed cousin's Christmas presents inside to ship - I think they made it safely.
I used a circle of construction paper under the ring to brighten up the lid and write the recipients name. Festive looking, huh?


I also had the kids repeat this on tin cans to make some pencil/tool holders for their daddy. I suggested they try doing fewer layers and they did which allowed some of the metallic shimmer come through. Now, I might have them do more for the school room.

Update on Chair pockets

We are loving the convenience of these chair pockets, but we discovered that turning the pillowcase on itself one more time gave us another two pockets (one on the side you sit, perfect if you only put a thin flat item in it) and made the pockets a more useful depth - the notebooks don't disappear inside.


(So, we started with the pillowcase right side out, turned 2/3 way inside out then back on itself so it is 1/3 the normal depth. Clear as mud?)

Monday, December 12, 2011

School notebook pockets

I just started having my big girls use spiral notebooks for their school work (their 3 ring notebooks are already too full and I'm not ready to thin them out). I needed someplace quick to store them as they just didn't stand nicely on the shelves and there wasn't enough room to lay them down. I had recently read a school teacher turned pillowcases into chair back pockets; I have extra pillow cases we don't use...so voila we have our solution!


First, I turned the case inside out.


Then turned it halfway right side out so the opening and the open end and the bottom seam met. At this point I just safety pinned the corners, but I will go back later and stitch the sides so they will hold better.


Finally, I opened one side to slip it over the chair back, so the notebooks sit on the bottom seam of the case.


The Girls picked out their own pillowcases and I can tell the side stitching will be necessary soon but the pins should be sufficient till the weekend. Quick, easy, and colorful. Who could ask for more?

Saturday, December 10, 2011

These were a HOOT to make

Armed with my new camera, I'm back with my newest project. Inspired by an owl bag on Pintrest, I decided to make some for some special young girls. I wanted to make them youthful but not babyish as the age of these girls range from 4 to almost 11.


It took some time cut all the pieces out.


It took a little longer to stitch the faces on. I've never done applique before so I had to play with the stitching some.


Made a simple pouch with a lining.


Then I added grommets and a cord. I have to admit, putting grommets into a project is kinda fun. I think I need more projects with grommets...


Done, and ready to wrap.